
I've played with sour dough starters for years and when I came across a no-knead sour dough recipe online last year I was blown away. The simplicity of this recipe is what gets me and the bread is tubular. Today a French scientist came up to me saying that he knows REAL bread and that the bread I make is the real thing, identical to what they often serve in his country. With that acknowledgement I decided to break open the vault and share this recipe for all to try at home. This recipe is documented and engineered to work in a dry climate and with as few steps as possible, and doesn't call for a dutch oven like most no-knead recipes do. Here's the recipe from the Toolik bakery by yours truly :)
Ingredients
4 cups bread flour
Semolina flour, corn meal or other flour as needed for dusting only
1 teaspoon kosher salt
1/4 teaspoon active dry yeast
1 tablespoon olive oil
1 tablespoon apple cider vinegar
2 cups warm water (~80 F)
1 1/2 tablespoons of chopped fresh rosemary
Equipment
1 heavy metal pizza pan or sheet pan
1 medium sized metal oven proof salad bowl
1 wooden spoon
Oven
Bread proofer - if no have, I will explain your situation later. No worries.
Cloth
Sunshine

1. Mix all the ingredients in the metal bowl with a wooden spoon.

Don't overwork yourself, 20-30 strokes is plenty. The few clumps here and there will add texture down the road.

2. Cover the bowl loosely with a towel or plastic wrap. Put in proofer at 80-82 F for 6 hours with enough humidity to turn the polar climate into something a bit more wet. I turn the humidity dial to 2. If you don't have a proofer and the top of your fridge is that warm, then that's perfect. Another option is to set it at room temperature (65-72 F) for 12 hours. Or, let it sit out at room temp. for three hours after mixing then put it in the fridge overnight and in the morning pull it out and let rest at room temp. for another three hours. Whatever works. The best quality so far has been using the overnight method.

3. Watch it grow and give it a name.
4. While waiting make an Alaskan blueberry cheesecake.

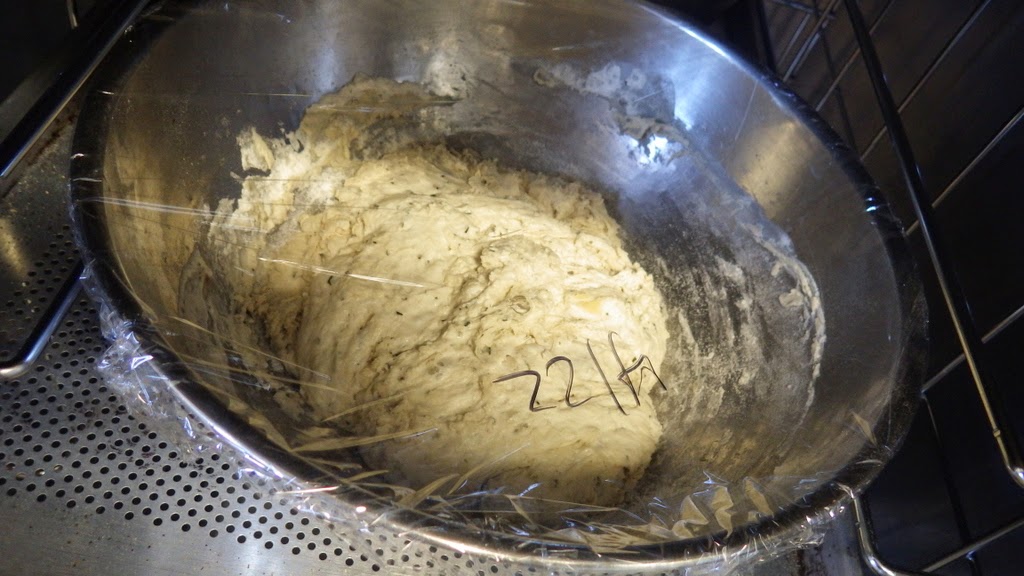
After the long wait it should look something like this. Remember, so far all you've done is mixed the ingredients in a bowl and put it in warm place to grow.

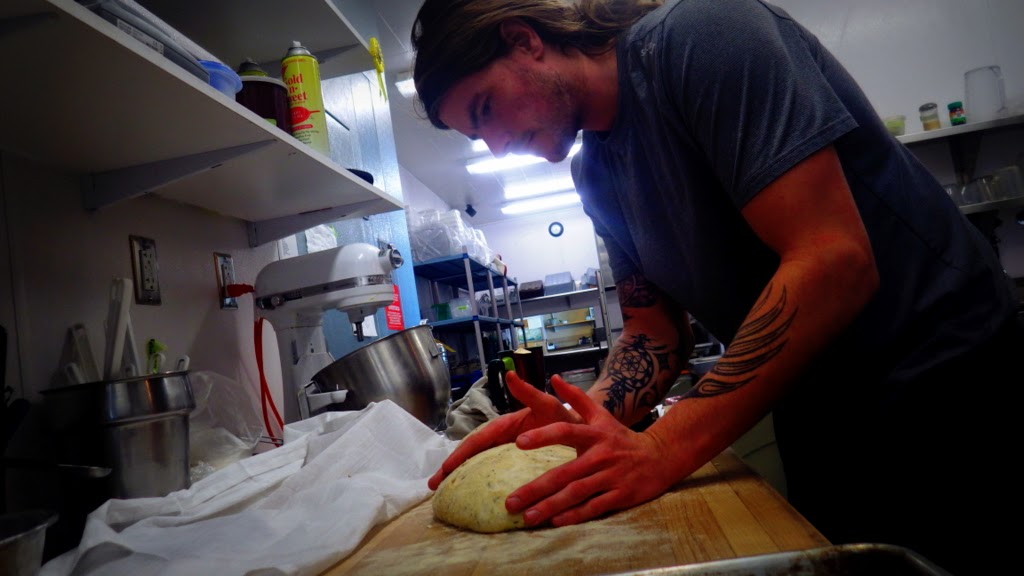
5. Dust an old wood table (or whatever table you like) with a nice helping of flour of some sort. I like to use semolina. Dump the heaping of bubbling matter gently onto the floured surface and gently shape it into a ball. This creates even rising. The goal is to not work the dough at all, e.g., punch it down, only direct the living dough into a bread-like shape. Cover with a floured towel and let rest for two hours total.

It should look something like this.


7. Carefully, pull the pizza pan out of the oven and invert the dough, seam side up, onto the hot pan. Quickly cover with the metal bowl. Note: be sure to clean the bowl before doing this step.


8. Put it in the oven at 450 F for a half hour. You can splash a half cup of water on the bottom of the oven to bring a little extra moisture to the party. After a half hour, take the upside bowl out and continue cooking for about 10-15 minutes more until the bread crust is foxy brown.

This is foxy brown...


and darn good. If you have any questions email me. Aloha!
